0 artículo(s)
Ver cesta
No tiene artículos en su carrito de compras.
When temperatures start dropping, every RVer faces the same challenge: keeping water systems safe and the rig ready for storage or cold-weather travel. Winterizing isn’t just a chore—it is the single most important maintenance task you will perform all year. A single unexpected freeze can crack fittings, split pump housings, or burst water lines hidden deep within your walls. The reality of RV ownership is that prevention costs pennies compared to the hundreds or thousands of dollars required to repair water damage.
At Enviro Design Products, we believe that taking care of your equipment shouldn’t be a mystery. Whether you are a full-time traveler heading south or a weekend warrior parking the rig until spring, this practical guide will help you winterize your RV quickly, confidently, and effectively.
Even a mild freeze can create expensive problems because water expands when it turns to ice. In a residential home, pipes are often insulated or buried below the frost line. In an RV, your plumbing is exposed to the elements, often separated from freezing air by only a thin layer of fiberglass or plastic. When water freezes inside a plastic valve or a brass fitting, it expands with enough force to fracture metal. You might not see the damage immediately, but the moment you pressurize the system in the spring, you will be greeted by leaks that are often difficult to access and repair.
Proper winterization does more than just save your plumbing. It protects your holding tanks from cracking, keeps your seals from drying out, and prevents the musty odors and mildew that come from trapped moisture. By taking the time to do this right, you are protecting your investment and ensuring that your first trip of the next season is spent relaxing, not chasing down leaks with a towel in hand.
The heart of winterization is removing water from the system. Gravity is your friend, but it is rarely enough on its own. You must start by disconnecting from your external water source and shutting off the water heater. Locate your low-point drains—usually poking out beneath the chassis—and open them, along with every faucet in the rig (hot and cold). Flush the toilet and open the outside shower if you have one. While the water drains, move to your water heater. Remove the drain plug or anode rod to empty the tank. This is an excellent moment to inspect the anode rod; if it is corroded, replace it now so you are ready for spring.
Once the bulk of the water is gone, you must choose your protection method: compressed air or RV antifreeze. Many experienced RVers use a combination of both for maximum security. If you choose the compressed air method, use an adapter to connect an air compressor to your city water inlet. It is critical that you regulate the pressure to no more than 30 or 40 PSI. Higher pressure can blow out the internal seals of your plumbing fixtures. With the air flowing, open one faucet at a time until only dry air comes out, then move to the next. Don’t forget the toilet valve and the shower head.
If you prefer the antifreeze method, you must use non-toxic RV antifreeze (usually pink), not automotive antifreeze (which is toxic and damages fresh water systems). Engage your water heater bypass valve first—you do not want to fill your six-gallon heater with antifreeze. Use your water pump’s winterizing intake tube to siphon antifreeze directly from the bottle, pumping it through the system until the pink fluid flows steadily from every faucet, the shower, and the toilet. This guarantees that the P-traps and pump internals are protected against freezing.
Your gray and black tanks are often overlooked during winterization, but they are just as vulnerable as your fresh water lines. Any liquid waste left inside can freeze into a solid block, potentially cracking the tank or damaging the termination valves. Before you store the RV, head to a dump station and empty both tanks completely. Use the tank flush system or a rinsing wand to clean out any sediment or debris that might harden over the winter.
Once the tanks are empty, you need to seal the system. This is where hardware quality truly matters. Standard sewer caps can sometimes degrade in UV light or become brittle in the cold, making them hard to remove later. Furthermore, a loose cap is an open invitation for pests seeking warmth. Mice and insects can squeeze through incredibly small gaps, and an open sewer outlet leads directly into your plumbing system.
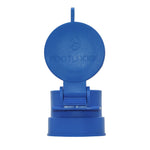
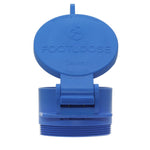
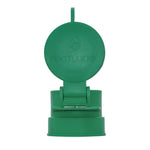
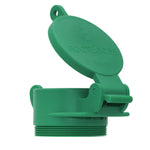
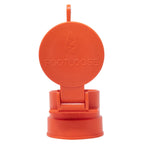
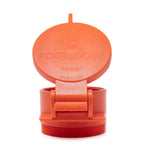
For the best protection, we recommend upgrading to the FootLoose RV Sewer Cap. Unlike traditional caps that require you to kneel in the mud or snow to wrestle with plastic bayonet lugs, the FootLoose allows you to seal your waste outlet securely using just your foot. It provides a rugged, airtight seal that locks in odors and locks out pests. Because it is built with durable, American-made materials, it withstands freezing temperatures without becoming brittle. Winterizing is dirty work, but using a hands-free cap adds a layer of hygiene and convenience that makes the process much more bearable.
Winter is harsh on rubber and plastic. The freeze-thaw cycle can cause seals to shrink and crack, leading to water intrusion. Before you cover the RV, walk around the exterior and inspect every seam. Check the caulk around windows, door frames, and clearance lights. If you see cracking or peeling, remove the old sealant and apply a fresh bead of RV-specific silicone or non-leveling lap sealant (for roofs).
Roof vents and air conditioning units are primary entry points for cold air and moisture. If you are storing your RV outdoors, we strongly suggest installing covers over your roof vents. These allow you to keep the vents slightly open for airflow without letting in snow or rain. For the air conditioner, a vinyl cover can prevent leaves and snow from accumulating inside the shroud, which can cause rust or block the fan. However, be cautious with full-body RV tarps. If you cover the entire rig, ensure the material is breathable. Plastic tarps that do not breathe will trap moisture against the RV walls, causing clear coat peeling and mold growth.
Don't forget the undercarriage. Road salts and moisture can accelerate rust on your frame, steps, and stabilizers. A thorough wash and a coating of lubricant on moving parts like stabilizer jacks, entry steps, and hitch components will keep them moving freely when you bring the RV out of storage.
Batteries are expensive, and cold weather is their enemy. A discharged battery can freeze and crack, rendering it useless. If you are storing your RV without power, the best practice is to fully charge the house and chassis batteries and then completely disconnect them. Many RVs have a "battery disconnect" switch, but even these sometimes leave small parasitic loads (like propane detectors or radio clocks) active. To be 100% safe, remove the negative cable. If possible, remove the batteries entirely and store them in a cool, dry place like a garage, connected to a smart trickle charger.
For your propane system, the goal is safety and preservation. Turn off the main valve at the tank or cylinders. If you have removable cylinders, you may want to store them in a secured, well-ventilated area away from the RV (never indoors). Inspect the rubber pigtail hoses that connect the tanks to the regulator; these often crack after a few years of sun exposure. If they look worn, winter is the perfect time to replace them. Cover the regulator and tank valves with a protective bag to keep ice and nesting insects out of the fittings.
The interior of your RV needs just as much attention as the exterior. While the plumbing is safe, the biggest threat to the inside of your camper is moisture. Temperature fluctuations can cause condensation to form on walls and ceilings, leading to mildew. Remove all food items, which can attract rodents. Clean the refrigerator and freezer thoroughly, and—this is crucial—leave the doors propped open. If you close them, you will almost certainly find mold in the spring.
To combat humidity, place moisture absorbers (like desiccant buckets) in the main living area, the bathroom, and the bedroom. Open all cabinet and closet doors to allow air to circulate. If you have electricity available, a small dehumidifier can work wonders. If not, and if your storage location is secure, cracking a roof vent slightly (under a vent cover) allows the air to exchange, preventing the stale, damp atmosphere that breeds odors.
Use the table below to ensure you haven’t missed a critical step in the process.
| System | Action Required | Why It Matters |
| Water Heater | Drain tank and open bypass valve. | Prevents tank rupture; ensures you don't waste gallons of antifreeze filling the heater. |
| Plumbing Lines | Blow out with air (30-40 PSI) OR fill with RV antifreeze. | Removes water that expands and bursts pipes. Prevents hidden leaks behind walls. |
| Waste Tanks | Dump and rinse black/gray tanks | Prevents "waste blocks" from freezing; keeps pests out; ensures a sanitary seal. |
| Pilas | Fully charge and disconnect (or remove). | Freezing destroys discharged batteries; phantom power drains kill battery life. |
| Tires | Inflate to max PSI; cover if outdoors. | Prevents flat spots and sidewall cracking from UV exposure and cold ground. |
| Interior | Remove food; prop fridge open; add moisture absorbers. | Prevents mold, mildew, and rodent infestation. |
| Exterior | Inspect roof seals; lubricate jacks/locks. | Stops water intrusion which causes delamination and rot. |
Winterizing requires a Saturday afternoon and a little bit of effort, but the payoff is peace of mind. You sleep better knowing that when the snow melts and the campgrounds open, your RV will be ready to roll without the headache of burst pipes or dead batteries.
We pride ourselves on providing the high-quality, American-made tools that make these "unglamorous" jobs easier. From the rugged simplicity of the FootLoose RV Sewer Cap to our complete line of wastewater management parts, we are here to help you protect your investment.
If you plan to travel during the winter months, click here for some handy information!