0 artículo(s)
Ver cesta
No tiene artículos en su carrito de compras.

You're breaking ground on a 75-site RV park. The engineer handed you plans. The contractor needs an equipment list. And somewhere between the excavation bid and the utility hookups, you realize nobody actually gave you a line-by-line breakdown of what goes into a dump station.
Here's the thing: a dump station looks simple from the outside. Concrete pad, a hole in the ground, a water hose. But the difference between a station that runs clean for a decade and one that generates maintenance calls every other week comes down to specifying the right equipment — and understanding why each component matters.
We've spent years supplying dump station equipment to parks across the country, and we run the largest dump station directory in North America through RVingLife (formerly Sanidumps). That means we see both sides: what operators order, and what RVers actually experience when they pull up to a station. This list reflects both perspectives.
Before we get into components, here's why getting this right matters more than ever:
Demand is climbing. New supply is limited. If you're building, you're building into a strong market — so build the dump station right the first time.
This is the backbone. Everything else sits on top of what you install below grade, and fixing plumbing mistakes after the concrete is poured means jackhammers and downtime.
The sewer riser is the vertical pipe that receives waste from the RV's sewer hose. Code in most states calls for a 4-inch trapped sewer riser, vented no more than 10 feet downstream. The trap prevents sewer gas from escaping back through the inlet.
What to specify: Schedule 40 PVC, 4-inch diameter. The riser should extend to the surface of the concrete pad, flush or slightly recessed. Make sure the trap is accessible — buried traps that clog are the number-one cause of dump station shutdowns.
What goes wrong without it: An untrapped riser turns your dump station into a sewer gas vent. Guests smell it from 50 feet away. You'll get complaints before the first weekend.
Required by the International Plumbing Code: a 4-inch vent pipe extending at least 8 feet above ground, installed downstream of the trap. This allows air into the system so waste flows freely and prevents the trap from being siphoned dry.
What to specify: Schedule 40 PVC, secured to a post or structure. Cap the top with a vent cap (not a solid cap — it needs airflow). Keep it away from buildings, windows, and picnic areas.
Install cleanouts at every change of direction and at intervals no greater than 100 feet along horizontal runs. This is the component most builders skimp on, and it's the one you'll wish you had when a blockage hits mid-July with 60 sites occupied.
What to specify: Two-way cleanouts at direction changes. Use cleanout covers rated for traffic if they're in drive areas. Mark their locations on your as-built drawings — you'll need them.
Operator wisdom: The parks that never have emergency plumbing calls are the ones with generous cleanout access. Spend an extra $200 on cleanout fittings now or spend $2,000 on an emergency rooter truck later.
A gate valve or knife valve installed on the main sewer line allows you to isolate the dump station for maintenance without shutting down the entire sewer system. Essential for multi-station parks or parks where the dump station ties into the same line as site hookups.
What to specify: Full-port gate valve, 4-inch, rated for sewage service. PVC or brass body. Install with union fittings so the valve itself can be replaced without cutting pipe.
Required by most jurisdictions where the dump station connects to a municipal sewer. A backflow preventer on the water supply side keeps contaminated water from entering the potable system. On the sewer side, a check valve prevents backflow during heavy rain or system surges.
What to specify: Reduced pressure zone (RPZ) backflow preventer on the water supply. Check valve on the sewer lateral. Both should be testable and accessible — inspectors will want to see them annually.
This is what your guests see and interact with. It's also where most operators underestimate the importance of getting details right.
Health codes typically require a minimum 3-foot by 3-foot curbed concrete apron, sloped toward the sewer inlet. But minimum is not optimal. A well-designed pad is 10 to 12 feet long and 6 to 8 feet wide — enough for a Class A motorhome to pull alongside without the sewer hose stretching across a gravel shoulder.
What to specify: 4-inch minimum concrete thickness, 1/4-inch per foot slope toward the drain. Curbed edges to contain rinse water. Broom finish for traction when wet. Include a separate drain or channel for surface water — you don't want rinse water pooling.
What goes wrong without proper slope: Standing water. Standing water breeds bacteria, freezes into a skating rink in winter, and makes guests assume the station is unsanitary even when it's been cleaned that morning. Slope the pad. It's the cheapest insurance you'll buy.
The sewer cap is one of the most-touched, most-abused components on the entire station. It gets stepped on, driven over, yanked open, and left in the sun 365 days a year. A cheap cap cracks, warps, or won't seal — and an unsealed inlet means odor, insects, and potential code violations.
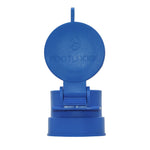
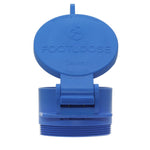
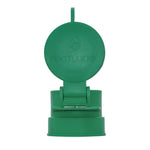
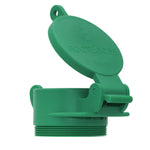
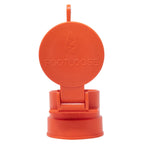
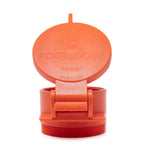
We recommend FootLoose sewer caps, and not just because we make them. The FootLoose is a foot-operated cap: guests step on it to tilt it open, so they never have to bend down and grab a sewage-contaminated cover with their hands. It's made from chemical-resistant, UV-stabilized material that holds up in Arizona summers and Minnesota winters alike.
What to specify: FootLoose caps come in male and female configurations. The female version taps directly onto a 4-inch PVC pipe. The male version threads onto a standard threaded PVC collar. Choose the configuration that matches your riser setup. They're available in multiple colors — some parks color-code by zone or use high-visibility orange for easy identification.
Why it matters: A cap that's hard to open or close gets left open. An open sewer inlet is an odor problem, a pest problem, and a liability. FootLoose caps make the open-close cycle effortless, which means guests actually use them correctly.
If your dump station ties into a below-grade junction box, grease trap, or holding tank, you need traffic-rated access covers. These aren't the same as cleanout caps — they're larger, load-rated covers that allow maintenance access to underground infrastructure.
What to specify: H-20 load-rated if in any area where vehicles travel. Locking or bolt-down style to prevent tampering. Cast iron or polymer concrete depending on your budget and corrosion environment.
A dump station without adequate water supply is a dump station that stays dirty. And a dirty station generates complaints faster than almost any other park amenity.
Most dump stations provide a dedicated non-potable water line for rinsing hoses, flushing the inlet, and cleaning the pad. This line should be completely separate from the park's potable water system — no cross-connections, period.
What to specify: 3/4-inch or 1-inch supply line, depending on your water pressure and distance from the source. Install a reduced pressure zone (RPZ) backflow preventer at the point of connection. Use purple pipe or purple tape to identify non-potable lines per code.
Common mistake: Undersizing the water supply. A 1/2-inch line with low pressure means guests spend 15 minutes rinsing instead of 3. That backs up the line during peak checkout (10 AM to 2 PM is the rush window at most parks), and backed-up dump stations lead to one-star reviews.
Provide a heavy-duty hose bib with a commercial-grade rinse hose. The hose takes more abuse than any other surface component — it's dragged across concrete, left kinked in the sun, and occasionally run over.
What to specify: Brass hose bib, frost-proof if you're in a freeze zone. Commercial rubber hose, 25-foot length minimum. Mount the bib on a post or bollard at waist height — not at ground level where it'll get backed into. Include a hose hanger.
What breaks first: The hose. Budget for replacing it at least once per season. The second thing that breaks is the hose bib handle. Keep a spare in your maintenance shed.
Brass or stainless steel fittings at every connection point. Plastic fittings crack in cold weather and strip in hot weather. Quick-connect fittings on the hose bib make hose replacement a two-minute job instead of a wrench-and-plumber's-tape situation.
EDP stocks a range of hose fittings and waste equipment specifically selected for dump station service — not residential garden hardware.
Signage isn't an afterthought — it's a code requirement and a liability shield. And frankly, good signage reduces misuse, which reduces your maintenance burden.
Required by every health department we've encountered. The sign must be posted at the water supply point and must clearly state the water is not for drinking — it's for flushing and cleaning only.
What to specify: Weather-resistant sign, minimum 4x6 inches, mounted at eye level near the hose bib. Bilingual (English/Spanish) if your park serves a diverse guest base. Permanent mounting — adhesive signs peel off in one season.
Post step-by-step dumping instructions at the station. This isn't patronizing — roughly 30% of RVers at any given park are dumping for the first time or the first time that season. Clear instructions reduce spills, misuse, and the number of times your staff gets flagged down for help.
What to include: Step-by-step procedure, a reminder to dump black water first then gray, instructions to rinse the inlet after use, and a note about what not to dump (cooking grease, motor oil, chemicals). Some parks include a phone number for maintenance emergencies.
An RV dump station sees 30-foot-long vehicles making tight approaches. Without physical barriers, guests will cut corners — literally — and run over hose bibs, vent pipes, and sign posts.
What to specify: Steel bollards (minimum 4-inch diameter, concrete-filled, painted yellow) protecting the hose bib, water supply post, and any above-grade piping. Wheel stops or curbing to guide vehicles. If space allows, design a pull-through layout so large rigs don't have to back up.
If your dump station will be used after dark — and it will — install adequate lighting. A single LED fixture on a pole or building wall, angled to illuminate the pad without blinding drivers. Solar-powered options work well for stations away from main electrical runs.
Drainage is the least glamorous category on this list and the one most responsible for long-term station performance.
Rinse water and minor spills need somewhere to go. A trench drain across the low edge of the pad, connected to the sewer system or a dedicated drain line, keeps the surface clean and prevents runoff from flowing into parking areas or landscaping.
What to specify: Polymer concrete trench drain with a slotted grate, rated for vehicle traffic. Minimum 4-inch width. Connect to the sewer system downstream of the dump inlet — not upstream, or you'll be pulling debris out of the trench drain constantly.
The area around the dump station needs to be graded so that surface water flows away from the station, not toward it. A paved or gravel approach apron (extending 15-20 feet in front of the pad) prevents mud from being tracked onto the concrete and gives guests stable footing.
What goes wrong: Parks that skip the approach grading end up with a mud pit next to their dump station during rain. Mud tracks onto the pad, clogs the surface drain, and makes the whole area look neglected. Grade the approach. Compact the base. Pave it if the budget allows.
If you operate in a freeze zone, every water line serving the dump station needs to be either below the frost line or heat-traced and insulated. The sewer trap should also be below frost depth — a frozen trap means a non-functional station and potential pipe damage.
What to specify: Bury water and sewer lines below your local frost depth (check with your building department — it ranges from 12 inches in the South to 60+ inches in the Upper Midwest). Install drain-down valves on water supply lines for winterization. If you're a seasonal park, include a documented winterization procedure in your maintenance plan.
You've got the dump station equipment list. Before you start ordering, work through these items:
Getting the dump station equipment right isn't complicated — it's methodical. Every component on this list exists because skipping it creates a specific, predictable problem. We've seen parks learn these lessons the hard way, and we'd rather you didn't.
If you're putting together an order — whether it's caps for a new build or replacement fittings for a station that's seen better days — browse our RV waste equipment collection or give us a call. We've helped parks of every size spec their stations, and we're happy to walk through your list.